How to Set Up a Turtle Tank: A Beginner’s Guide
If you’re new to turtles and planning to get one soon, then you should be able to provide it with a suitable habitat that mimics its natural habitat in the wild. There are certain things to keep in mind when setting up your turtle tank to make it a healthy and comfortable living space for your pet.
In this beginner-friendly guide, we’ll walk you through all the basics of setting up your turtle tank, including all the essential equipment you need, and how to create an optimal basking and swimming areas. We’ll offer additional info on various substrates and decors to consider for your tank.
How to set up your turtle tank (step-by-step guide)
Contents
In this section, you’ll discover all the essentials you need and step by step guide to creating a habitat for your pet turtle.
What you’ll need:
- Appropriate tank size
- Basking platform
- UV light
- Heat lamp
- Filtration system
- Water heater
- Substrate (optional)
- Décor accessories (optional)
Step-by-step guide:
Step 1. Choose the right tank size
The first thing you’ll need to do when setting up your turtle’s tank is to get a tank that’s spacious enough for your pet turtle to swim and move around.
A common guideline for choosing the right tank size is to get 10 gallons for every inch of your turtle shell length. This is to say if your turtle is 6 inches long, you should get a 60-gallon tank.
Generally, if you’re unsure what size of turtle tank to get for your turtle, consider going with the biggest option available. Bigger is always better!
Step 2. Cover the bottom with substrate
Substrate isn’t necessary for your turtle tank set up, so you can skip this part and go with a bare bottom. The reason experienced turtle owners advise against using substrate is that it can make your tank hard to clean.
It tends to trap bits of food which can then decompose over time and create unhealthy living conditions for your pet turtle.
You may only consider using substrate if you plan to add live plants to your turtle tank.
Here are some common substrate options to consider for your turtle tank:
- Sand: Sand is a popular choice of substrate, especially given that some turtle species like digging. However, it can make your tank cleaning a hard task.
- Pebbles: If you have aquatic plants in your aquarium, consider fluoride pebbles for substrate. We recommend larger pebbles to minimize the chances of your turtle swallowing them.
- Gravel: The gravel usually comes in different shapes, forms, and colors, and can help make your turtle aquarium look clean and eye appealing. However, its small size means your turtle may ingest it and cause impaction.
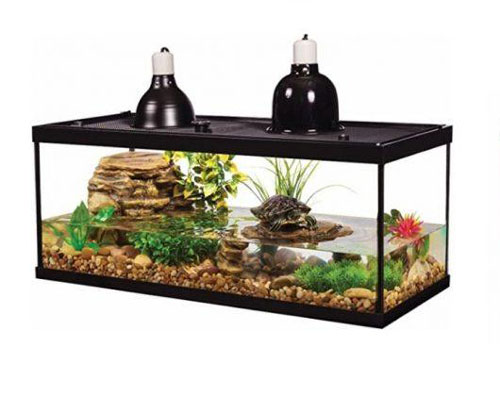
Step 3. Set up the basking area
A basking platform is a crucial part of your new turtle’s habitat. It’s where your turtle gets to rest when it doesn’t want to swim. Here, it dries its body off and soaks in the UV rays that are important for its health.
With this in mind, you want to come up with a comfortable basking area that’s spacious enough for your turtle to turn around and has no sharp edges that may injure your turtle.
It should also be totally dry, meaning it should be positioned off the waters.
Make sure the basking spot is easily accessible by your turtle. If need be, install a ramp for easy access.
Assuming you’re setting up your turtle tank indoors, you should also equip the basking spot with a UV light. This will provide your turtles with the UV rays necessary for proper calcium absorption for healthy shell and bone growth.
Additionally, you’ll need to add a heat lamp to the basking area. This mimics the sun heat the turtle gets from the sunlight in wild.
The heat will help keep your turtle warm when out of the water as well as help it dry off its skin.
Step 4. Create the swimming area
Once you have the basking area set up, the remaining area serves as the swimming space. This is where your turtle will be spending most of its time, so it should be spacious enough for it to enjoy hours of swimming.
A filtration system should also go to the swimming area to help keep the water clean. There are several filter options to consider, but most turtle experts recommend going with a canister filter.
This model is highly efficient and can handle high-capacity filtering. We advise choosing a filter rated 2 or 3x higher capacity than your turtle’s actual capacity. A submersible filter is also popular but works best for small turtle tanks.
You’ll also need to install a water heater to help maintain the water temperature at the recommended range of around 78 to 80 degrees Fahrenheit for most aquatic species.
This is important given that turtles are cold-blooded animals and rely on their environmental temperature to regulate their body temperature.
Make sure you have a covering over the submersible heater to keep your turtle from bumping over it and getting burned.
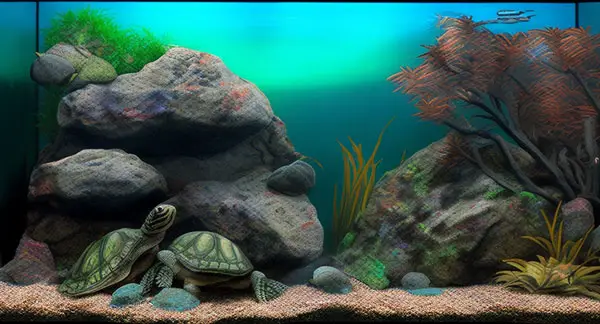
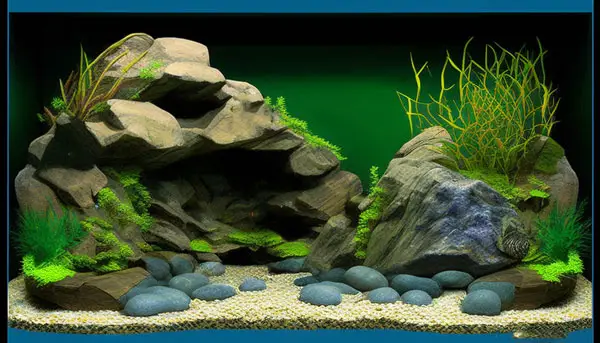
Step 5. The decoration part
Adding decoration items to your tank can help make it more eye-pleasing while making it a more interesting environment for your pet turtle.
However, decorations aren’t necessarily important as they don’t affect the survival of your pet in any way.
To decorate your turtle tank, you can use smooth rocks, logs, and caves to act as hiding spots for your turtle. Just don’t overdo it to avoid taking up much of the turtle’s swimming and basking spaces.
Keep these tips in mind when adding décor accessories to your pet turtle tank:
- Avoid any décor items that have sharp edges as they can easily injure your turtle
- Avoid using too small items that your turtle may easily swallow and cause serious digestion issues such as impaction which can lead to severe constipation.
- Any décor items obtained from the wild should be first sterilized before putting them into the turtle tank. This will ensure they don’t transfer any diseases and parasites to your turtle’s habitat.
- Only use aquatic plants that are safe and non-toxic for your turtle as they’ll definitely try to eat them.
Step 6. Fill the tank with water
At this point, everything is set up and all that’s remaining is to fill your new turtle’s habitat with water. Ensure you bring the water to a level that’s sufficient for your turtle to comfortably swim in.
As the rule of thumb goes, you should fill the tank with water to a depth of up to ¾ the length of your pet turtle. This is a safe depth for your turtle to easily flip itself if it accidentally turns upside down while inside the water.
You’ll also need to ensure you use distilled or de-chlorinated water that’s safe for your freshwater turtle.
We found this helpful video showing step-by-step how to correctly set up a turtle tank.
Video:
Final Verdict
When setting up a turtle aquarium, try as much as possible to mimic your turtle’s natural habitat in the wild. You should start by getting a spacious tank size that allows your turtle plenty of room to swim and move around. Equip the tank with a basking spot with UV lighting and a heat lamp. Make sure the enclosure has plenty of swimming space and equip it with filtration to keep it clean. A heater is also essential for keeping the water temperature at the recommended range. Substrate and decorations are optional but help create a natural look to your tank.